Discount Products: Look through products available for a 25% – 50% discount in 2020. The items provided on a first come, first serve basis. View Discounted Products
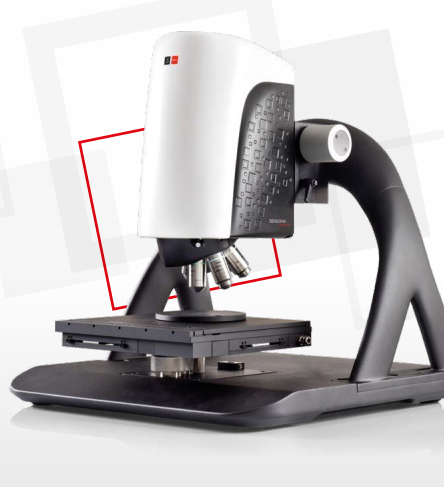
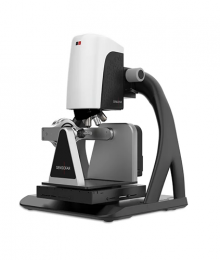
Sensofar Metrology S neox
Simply powerful
- Sample Navigation – An overview tool helps the user to inspect the sample during measurement preparation
- Auto 3D Function – the SensoSCAN software automatically
- Analysis & Reporting – It is also possible to create analysis templates
- Automating procedures module – Automated measurements are obtained using the Recipes tool
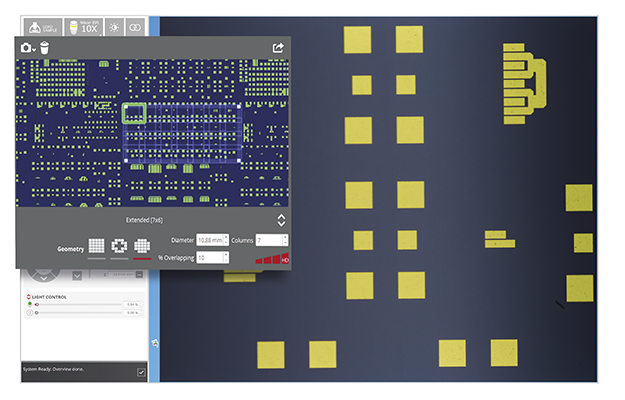
- Extended measurements module – Allows the user to easily define the measurement layout on the surface by means of the overview image
Introducing the Sensofar Metrology S neox
Engineered for Speed QA/QC and R&D Solution
Software drives the systems with its clear and intuitive user-friendly interface. The user is guided through the 3D environment, delivering a unique user experience.
Sample Navigation
An overview tool helps the user to inspect the sample during measurement preparation, check measurement positions before acquisition as well as assist in the automation procedure. Working with high
magnification will be easier, as you will know where you are at every moment.
Auto 3D Function
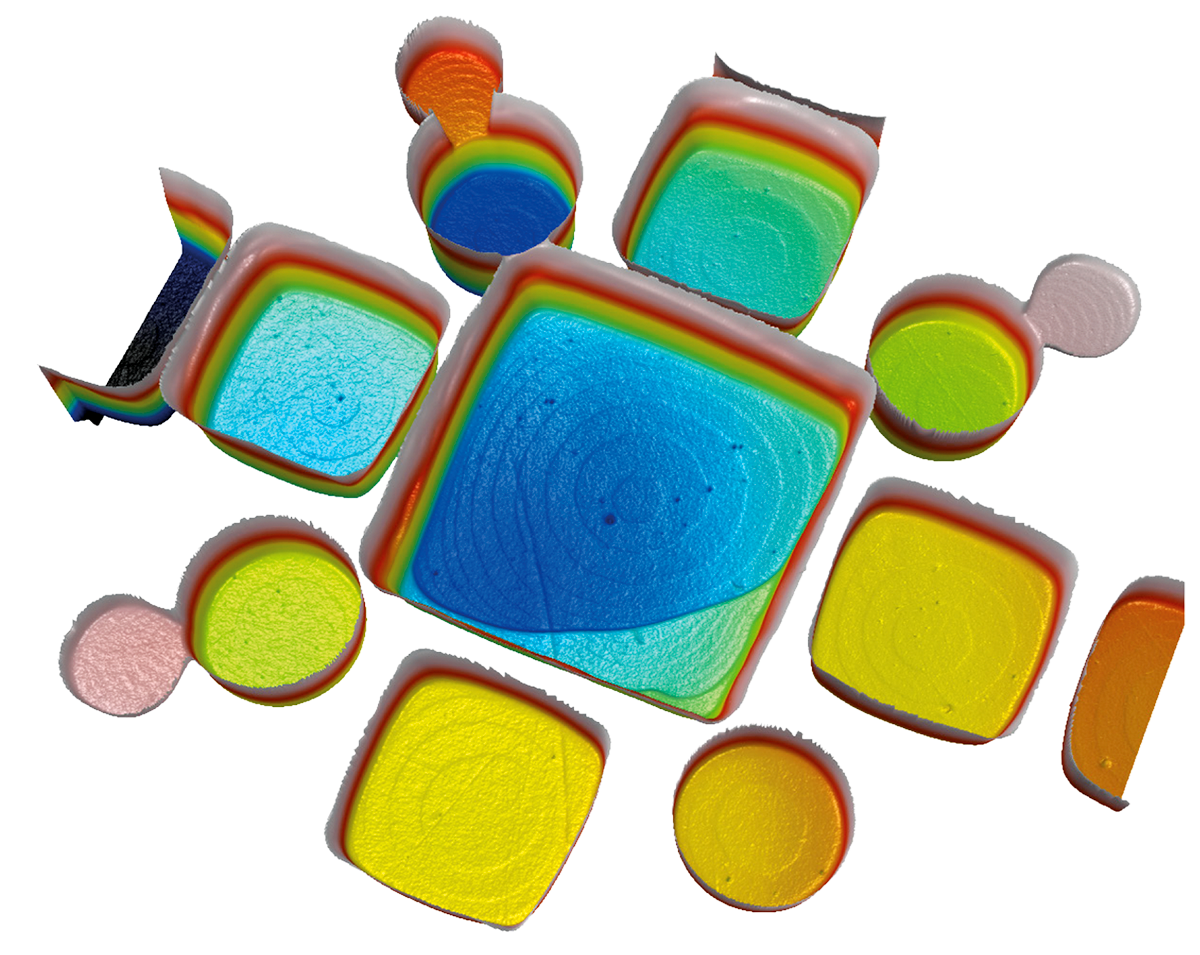
Selecting 3D Auto function, the SensoSCAN software automatically determines the correct illumination and the appropriate measurement range, and then performs the chosen measurement type. A
high-quality result can thus be obtained within just a few seconds.
Analysis & Reporting
It is also possible to create analysis templates to apply pre-determined filter and operator configurations to repeated measurements. And finally, obtain a clear and well-structured report for each
measurement, showing the 3D data, a 2D profile and all the ISO parameters.
Automating procedures module
Automated measurements are obtained using the Recipes tool, an easily customizable tool for creating quality control procedures. It is ideal for Quality Control inspection, and it is extremely easy to define procedures for automating measurements with the profile manager tool, sample identification, data exportation and ‘pass or fail’ criteria.
Extended measurements module
SensoSCAN’s extended measurements module allows the user to easily define the measurement layout on the surface by means of the overview image. The area can be automatically cropped to
rectangular, circular or ring areas of interest. Wide areas up to 500 million pixels are possible. Several scanning strategies such as autofocusing on each field, or focus tracking to minimize vertical
scanning range are available.
Multiple powerfulacquisition settings
Numerous acquisition parameters can be adapted to best suit the intended measurement. For example, various autofocus settings help to reduce the acquisition time, HDR function helps to improve the illumination of complex 3D structures and selectable Z-scan options
also provide an opportunity to optimize the acquisition for varying 3D surfaces.
Key Features
Easy-to-use
Sensofar is continuously working to provide the most incredible experience to our customers. With the fifth generation of the S neox systems, the goal has been to make it easy to use, intuitive and faster. Even if you are beginner user, the system can be managed with just one click. Software modules have been created to adapt the system to the user requirements.
Faster than ever
Everything is faster than before with new smart and unique algorithms and a new camera. Data acquisition is taken at 180 fps. Standard measurement acquisition is 5X faster than before.
Making the S neox the fastest areal measurement system in the market.
Quality control
Automated modules have been created to facilitate all QC procedures. Ranging from operator access rights control, recipes, compatibility to barcode/QR readers, and customized plugins from our proprietary SensoPRO software to generate pass/fail reports. Our optimized solutions are able to work in QC environments due to their flexibility and easy-to-use interface, which can be programmed to work 24/7.
Traceability
Every S neox is manufactured to deliver accurate and traceable measurements. Systems are calibrated using traceable standards following the ISO 25178 standard for: Z amplification factor, XY
lateral dimensions, flatness error, as well as parcentricity and parfocality.
Key Benefits
SensoPRO
It has never been so easy to perform fast quality control in a production line. Thanks to SensoPRO, the operator in the production line only needs to load the sample and follow guided instructions.
Plug-in-based data analysis algorithms provide a high degree of flexibility. New modules can be easily customized to other industry needs.
Sequential operators
A comprehensive set of operators provides the opportunity to retouch data points, restore non-measurable data, remove form (plane, sphere, polynomial), apply a range of filters and/or generate alternative layers by cropping, subtracting or extracting a profile. It is also possible to create analysis templates to apply pre-determined filter and operator configurations to repetitive measurements.
SensoMAP
SensoMAP, based on Mountains technology from Digital Surf, is an extremely powerful tool for analysis and reporting. SensoMAP software is completely modularly adaptable to customer requirements. Two levels (standard and premium) and several modules (2D, 3D or 4D modules, Advanced Contour, Grains & Particles, Statistics and Stitching) are available.
Trust the Experts at Spectra Research Corporation
Spectra Research Corporation (SRC) offers a range of innovative high-quality scientific products and laboratory services to industrial and scientific markets throughout Canada.
Specifications
| Measuring principle | Confocal, PSI, ePSI, CSI, Ai Focus Variation and Thin Film |
| Observation types | Brightfield, DIC, Sequential Color RGB, Confocal, Interferential Phase Contrast |
| Measurement types | Image, 3D, 3D thickness, profile and coordinates |
| Camera | 5Mpx: 2442×2048 pixels (60 fps) |
| Total magnification (27″ screen) | 60X – 21600X |
| Display resolution | 0.001 nm |
| Field of view | from 0.018 to 6.7 mm (single shot) |
| Max. Extended measuring area | 10×12 (Max. Resolution); 175×175 (Low resolution) (500 Mpx) |
| Confocal frame rate | 20 fps (5Mpx); 60 fps (1.2 Mpx) |
| Vertical scan range coarse | Linear stage: 40 mm range; 5 nm resolution |
| Vertical scan range fine | Piezoelectric scanner with capacitive sensor: 200 μm range; 0.5 nm resolution |
| Max. Z measuring range | PSI 20 µm; CSI 10 mm; Confocal & Ai Focus Variation 34 mm |
| XY stage range | Manual: 40×40 mm; Motorized: 114×75 mm, 154×154 mm, 255×215 mm, 302×302 mm |
| LED light sources | Red (630 nm); green (530 nm); blue (460 nm) and white (575 nm; center) |
| Ring light illumination | Green ring light compatible with 6 position nosepiece |
| Nosepiece | 6 position fully motorized |
| Sample reflectivity | 0.05 % to 100% |
| Sample weight | up to 25 Kg |
| Sample height | 40 mm (standard); 150 mm and 350 mm (optional) |
| User Management rights | Administrator, supervisor, advanced operator, operator |
| Advanced Software Analysis | SensoMAP, SensoPRO, SensoMATCH, SensoCOMP (optional) |
| Power | Line Voltage 100-240 V AC; frequency 50/60 Hz single phase |
| Computer | Latest INTEL processor; 3840×2160 pixels resolution (4K) (27”) |
| Operating system | Microsoft Windows 10, 64 bit |
| Weight | 9 61 Kg (134 lbs) |
| Environment | Temperature 10 ºC to 35 ºC; Humidity <80 % RH; Altitude <2000 m |
Datasheet


